Day 147- Free Box
Sometimes, the best thing to do in order to keep your life clean and hygienic is to just get rid of stuff. Stuff has a tendency to pile up and get in the way. Kicking it to the curb is sometimes all you really need to do get our lives in order.
I first discovered the glory that is the Free Box while at Earlham. They had a giant box in the student center where people would put in their old closed, used books, funky CD's or chipped dinner plates. They were free for the taking. I would go there daily to see what I could find. I gave myself one rule, add an item for every one I took away. I would also give up an item of equal coolness to what I found.
This made sure the equilibrium of the freebox would stay fairly constant. There is nothing like finding that same lame book everyday for three weeks in a row. Or that ugly sweater. Or that too broken dish.
But now that I am not at Earlham, I sometimes wish I had a freebox to go to to get rid of stuff. There is always Freecycle, the national network of people who just like to trade each other's stuff. And that is all well and good, especially when it comes to things like furniture or nicer things like that. But what if your stuff is nice, but not "freecycle nice"?
That is when I start my own free box. I grab a large cardboard box and I fill it with my things. I then write "FREE" in big letters and I take it out to the curb.
I live on a busy enough street that most everything is gone by the end of the day. Anything left is usually sent down the the thrift store drop off site a few blocks over.
I have a few rules for the free box:
1. Only put things in there I would be happy to get free. If I don't think any one would want it, it might as well go into the trash.
2. Clothing has to be wearable. Jeans with crotch holes, work clothes coated in paint, ties that are fraying at the end--none of those are free box worthy.
3. Don't let it stay out for more than two nights. That just becomes an eyesore. Lets face it, sometimes people just don't want your stuff. That's OK. You don't want it either.
Tuesday, May 27, 2008
Day 147- Free Box
Friday, May 23, 2008
Day 143--When Cheap Ass Hobbies Become Expensive
Day 143- When Cheap Ass Hobbies Become Expensive
As a photographer, technology sure has made one of my hobbies cheaper and easier to perform. Film has been replaced with reusable digital data cards. And the darkroom has been replaced with photoshop and inexpensive printers.
However, it has not come without its fallout.
In order to stay competitive, Kodak--the inventor of the affordable camera--as ceased to make film cameras. And Polaroid has stopped making instant film.
No big deal right?
Not for me.
One of my personal favorite techniques is the emulsion transfer. It is where the artist takes a professional quality of instant film and before the emulsion dries onto the paper, the artist transfers it to a piece of watercolor paper. The effect is interesting and unusual.
However, with Polaroid ending it is production of instant film, not only are the days of my hobby numbered, each day the materials become more expensive.
What once cost $5 for materials now cost $20, $25, even $30 depending on what site you use.
Yup, one of my cheap ass hobbies has become expensive, and ultimately obsolete.
I bought two packs of film the other day, all I could afford right now. I am afraid they may be my last.
Good-bye Polaroid Emulsion Transfer, you have been a good hobby for me. I will miss you.
Monday, May 19, 2008
Day 139- Food as Hygiene (Slow Foods)
Day 139- Food As Hygiene (Slow Foods)
Hygiene is not just about making your body smell good. It is about making your body feel good.
So today, our radical hygiene segment is about what you put in your body to feel good.
We all know that a good diet has long term effects on how our bodies feel and react to our environments. But how do we know what to eat that will make us feel good?
The slow foods movement believes the easiest way to discern is by trusting nature. As natural beings, we feel best when our bodies are in tune with our natural surroundings. This does not mean eating "natural foods" but rather foods that resemble nature.
The slow foods movement began about a decade ago in Italy. It is not a list of rules, but rather a philosophy of how to eat.
Simply enough, slow food is seasonal, local and simple.
1. Seasonal--Fruits, vegetables, and meat are all the most healthy when they are prepared according to season. Growing a tomato in winter requires a lot more resources and puts stress on the fruit. Ultimately, out of season fruits and vegetables do not taste good and they are sapped of vitamins and minerals.
2. Local-- Organic is great. I support organic foods a lot. But, if it is grown on a factory farm somewhere on the other side of the continent, hemisphere, or world, and then shipped to you many of the benefits of buying organic foods will be counteracted. Also, buying locally (or growing your own) guarantees that your food is picked at the peak of freshness
3. Simple--Americans have forgotten what food should taste like. Our food is full of sugar and fat and chemicals. But there are few meals as satisfying as a simple dish made with quality items that have complimentary flavors and textures.
With those three guide lines, I give you my philosophy on slow foods. These are the things I try to think about when I think of food.
1. Have a relationship with my food- I love going to my farmer's markets. I love getting to know the people who make my food. I also like growing my food in my garden. By having a relationship with my food, it becomes more than just what I put in my mouth. I become much more in tuned with my food.
2. Try not to eat anything I cannot pronounce- Quick food is convenient. But often it requires all sorts of chemicals I cannot pronounce. And if I cannot pronounce it, it should not be going into my body. Tomato= eat. Monohydrogenated sodium bepotal= do not eat.
3. Four Walls- Sometimes, you do need to go to the grocery store. It is really convenient, especially when you don't have a farmer's market. But think of the layout of the super market. If you go along the four walls, you get the freshest foods. Produce, freshly baked goods, animal protein, dairy all lie along the four walls of the store. When you start moving into the aisles, you start to see things that are not fresh. You see things that are jam packed with chemicals. Although, there is a caveat, there are plenty of good, healthy things in the aisles. For instance, flour, olive oil, frozen veggies, pasta. Just be thoughtful about what you are eating.
4. Avoid anything "all-natural"--Anything that has a label that says "all-natural" is probably an advertising gimmick, especially if it comes from a muti-billion dollar corporation. Really, what would all-natural Ritz crackers really have in them? There is no way to know, and that is not slow foods.
Slow foods is a great philosophy on life, in my opinion. But it does not always work. It is a commitment. And in this go-go gadget world of ours, we cannot always commit to it. As one finds out, it becomes increasingly more difficult in the winter months. But it is worth a try. One may even find it enjoyable and preferable.
And, you also cut down the risk of eating nothing but junk food all day long and then find yourself doubled over and vomiting in front of a night club on 14th St NW. Not that I have any real experience of that at all.
What a coincidence! Both How-To's of the day are on radical hygiene. And one of them is about Slow Foods. It is cosmic, I tell you. Cosmic.
Competency moment: Bought strawberries at Eastern Market (complimented a dollar off each quart saving $4) and made a year's worth of strawberry jam.
Friday, May 16, 2008
Day 136-Pickles
Day 136- Pickles
As a belated Mother's Day Present, this week's entries are created by request. My mom wants to learn how to make pickles.
Now that we have our cucumbers in our clean jars with brine and spices, it is time to preserve our pickles.
The canning process is not too difficult, but it does involve boiling, so please be careful. It is best if you have some one to assist in this process.
The Ball Canning company has a great and easy to follow guide on how to preserve your food. The simple boil method works only with high-acid foods. The acid helps preserve and protect the food from bacteria like Lactobactcilis. Things like pickles, tomato sauces, and fruit jams work perfectly with this method. However, low acid fruits and veggies must go through a more difficult and complicated method using pressure cookers. When in doubt, consult your trusted and tested recipe. Recipes are available on-line at freshperserving.com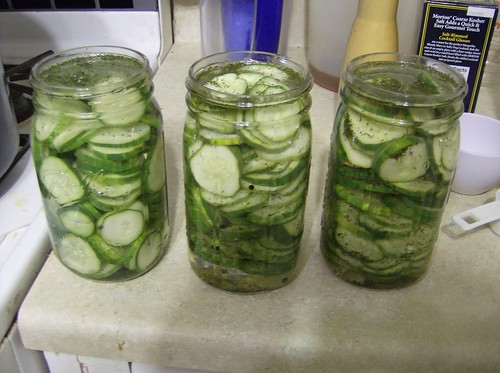
Now that your cucumbers are ready to cap, make sure you have a large pot or stock pot full of enough water to cover the jars. Boil the water to a rapid boil.
Next, you wipe the rim of your jars with a clean tea or paper towel. Center and place the lid onto the jar. Firmly twist the ring over the lid to create a firm seal. Do not worry about tightening the ring. Your cans should look like this: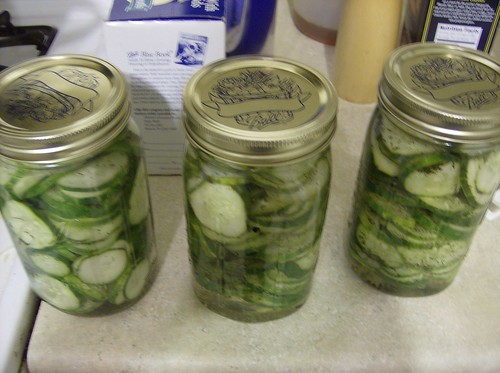
The lids should pop up, just like lids from the grocery store. A popped lid is an open jar. But the "bubble" will go away after you boil.
Next, carefully place the jars into the boiling water, this has the following effects:
1. Cooks the food inside of the jar
2. Sanitizes the contents
3. Creates the vacuum seal
Boil the jars for as long as the recipe calls. In this case, the cans were boiled for ten minutes.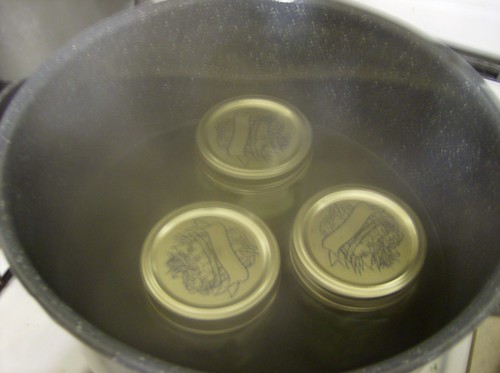
Let the water cool and carefully remove the jars from the water and place on a dish towel. This will act as insulation so that the glass jars do not experience heat distribution too quickly. Without the towel, you run the risk of the jars cracking. That is not yummy.
Your cans should look like this now: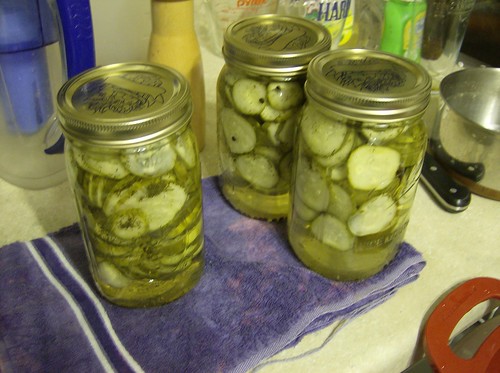
MMMM...pickles!
Let the cans sit out over night on the dish towel and let them cool. If you are lucky, you will find the oh so satisfying sound of the lids popping. This will let you know that the vacuum seal is complete.
After 12-24 hours cooling, check for the "bubble" on the lid. It should have disappeared. Place in a cool, dark spot where they will not be disturbed. A basement or pantry will do the job just fine. Follow the directions of the recipe for how long to store. I believe this particular recipe calls for one month storage. The hard part is keeping the self-discipline to not pop them open immediately. A properly canned pickle can last for about one year.
Our house found it extremely enjoyable to open a jar of pickles or olives in December or January to have a little bit of summer come into our lives. We also would can spaghetti sauce and apple butter.
This weekend, I will be making berry jam.
I hope you all have a great time learning how to home preserve in order to save money in the future.
Thursday, May 15, 2008
Day 135-Pickles
Day 135- Pickles
As a belated Mother's Day Present, this week's entries are created by request. My mom wants to learn how to make pickles.
To better understand the pickling process--more than just stuff in brine--you have to understand mason jars. Not only that, but working with mason jars can be dangerous if you don't use them properly.
Mason jars were invented in 1884 as a convenient way to store perishables. In a world where there was no refrigeration, one needed a way to keep an air tight seal free of bacteria. Mason jars seemed to have gotten the job done since 124 years later, they are still around.
Mason jars have three parts, the glass jar, a metal band, and a metal lid. The jar a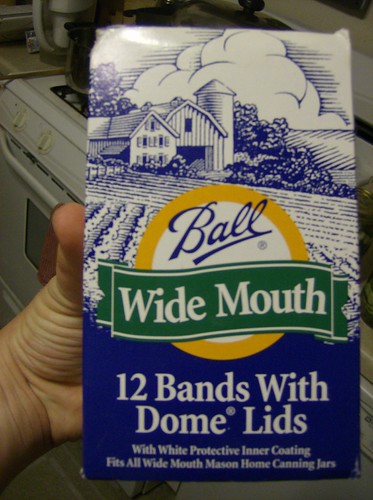 nd band are both reusable, the metal lid is not. The lid has a sealing agent that only works once.
Mason jars are available at most large grocery stores and hardware stores. If you find jars at a thrift store or second hand store inspect them for any large chips or cracks. Those are great spots for bacteria to hide. Lids and bands are available where ever new cans are sold.
Canning does not take a lot of work. But it does take some boiling, which we can cover tomorrow.
After boiling in the cans, any bacteria is killed and the slow fluctuation of temperature causes the hot, expand gasses to condense and create a vacuum, thus preserving your fruits, veggies or sauces.
As for your pickles, you have cleaned and cut your cucumbers, you now need to create a brine.
For your brine, you need:
6 cups of water
2 1/2 cups of vinegar (I use cider or distilled white)
1/2 cup kosher salt
Bring your brine to a boil, and stir until all the salt is dissolved.
In the bottom of your clean mason jars, add one clove of garlic and about a half dozen whole pepper corns.
Proceed to pack your jars with cucumbers until full. Leave about 2 inches of head space in order to make room for the brine. Top with about 2 tablespoons of whole dill weed.
Your jars should look as such: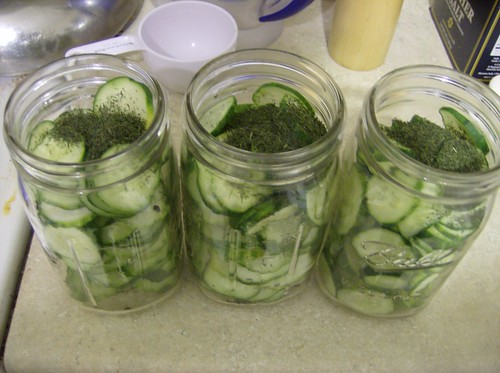
Here, there are cucumbers packed into clean jars with the pickling spices. You can also purchase pickling spices from Ball or the grocery store, but I like the simplicity of mixing the spices myself.
Carefully add the brine to the jars, keeping about an inch of head space at the top. The cucumbers will most likely float. That is ok.
In the photo below, I overfilled the jars. This was before I learned about the importance of head space. Having head space makes it easier to open when you are ready for those delicious pickles.
At this point, make sure any utensils you use to stir or pack are rubber, plastic or wood. Using a metal utensil will run the risk of oxidizing the pickles. Not too appetizing.
Tomorrow, I will explain the actual canning process. It is not too difficult.
Competency moment of the day:
I am sending in the house application for a new house in Columbia Heights. It is a cute house for $1500 less a month. Although we have to lose 2 people, it is going to be a great new home.
Tuesday, May 13, 2008
Day 133- Pickles
Day 133- Pickles Part 1
As a belated Mother's Day Present, this week's entries are created by request. My mom wants to learn how to make pickles.
Spring time is here and as we move into the summer months, we see an amazing array of fresh fruits and veggies. All across America, we have seen the growth of farmer's markets and locally owned green grocers.
I love going to farmer's markets for 3 reasons:
1. Creating a relationship with the people who grow and produce my food.
2. It is guaranteed to be fresh because it is picked and delivered on the spot.
3. Locally and/or organically grown food is better for our environment and economy because we reduce our dependence on petroleum in our growing process.
For the reasons above, I also like pickling and canning my fruits and veggies as they are in the peak of ripeness.
But what exactly is a pickle? A pickle is anything that has be preserved in brine. A brine is a solution of salt, vinegar and water. Beyond those three ingredients, you can have a whole array of brines: dill, sweet, spicy, etc.
This week, I will show you how to make my favorite pickle--the kosher dill pickle. This recipe is easily found all over the Internet. I use the Joy of Cooking's Quick Pickle Recipe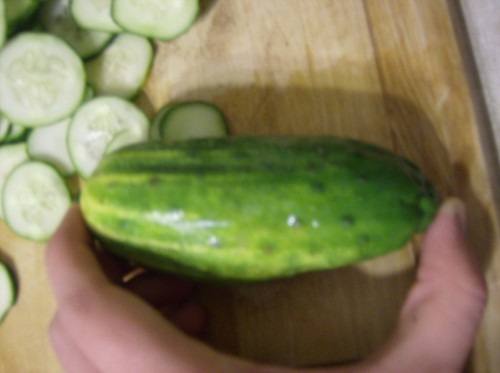 .
.
Step 1: Select your cucumbers. In this picture, you can kind of see what we are looking for. Your cucumbers should be about four inches long, have some nice variation of colors. Ideally, you have a good spacing of bumps and smooth areas. The flesh should be firm with a slight give. You want to avoid soft and mushy spots. If they have some pre-cut, you want the center to be firm with tight grouping of seeds and nice, white flesh. Purchase about 4-5 lbs of cucumbers.
Step 2: Wash and slice your cucumbers. Give your cucks a good rinsing. Make sure all the dust and mud is cleaned away. Cut off the ends of the cucumbers and thinly slice. No need to go crazy and bring out the mandolin or anything just a quick slice of the fruit. Now is a good time to get rid of any stray soft spots.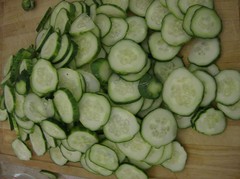
Step 3: Make sure your Mason Jars are clean.
Tomorrow, we will talk about Mason Jars and brine.
Thursday, May 8, 2008
Day 130- GCal updater
130-GCal Updater
A few months ago, I wrote a post on syncing all your calendars together in order to get your life focused. At the time, I thought it was not too difficult. But Google has made it even easier. With just a quick download, you have a program that will automatically sync your calendars together--specifically GCal and Outlook.
And this is really great. I use GCal at home because it is always there and always on. Even if I cannot get to my laptop, I can borrow someone else's computer and still have access to my computer. I also like how GCal sends me e-mail reminders if I want them. And now they offer text messeges, too.
But Outlook is the office interface we use at work. Outlook is perfectly fine for us. But I hate trying to navigate the at-home interface.
I like the Outlook/GCal program because it is 100% automatic. You just tell the program how often you want your calendars synced and it will do it.
What I do not like is that this program only syncs your main GCal. If you are like me and keep seperate calendars for seperate parts of your life, GCal will not transfer everything over for you. On top of that, it takes everything from Outlook and plops it into your main calendar.
Ideally, I would like to see google fix this problem. I would like them to know that my outlook dates should go into my Work Calendar. I would also like the program to be able to take my personal activities (like dates with Xine, house meetings, and concerts) and sync them into my Outlook so that I didn't have to keep two calendars open at the same time at work.
Overall, I am excited about the GCal updater. But it really isn't all that great for advanced outlook and GCal users. If you know how to do anything beyond setting up an appointment at the right time on the right day, this program is not for you. Because frankly, this thing does not do anything you can't already do for yourself.
However, if you only keep one main calendar, you don't add labels or do any advanced calendar features, this will make you very happy.
Sorry about all the empty days without posting. It has been my goal to post once a day. But the beginning of the week was crazy busy. And then I got sick. So, now it is Thursday and I am posting for the first time.
Friday, May 2, 2008
Day 122- Fixing Cookign Disasters
Day 122- Fixing Cooking Disasters
At an early age, my dad got me and my brother into the kitchen to help him cook. Since then, I have really enjoyed cooking, which is good. When I became vegetarian, I had to learn how to cook for myself. Since then, I have become the resident cook for our family and one of the resident cooks for our Co-Op.
Cooking your own meals are great. They cost less and are healthier for you and the environment. I know a lot of people--who went through college no less--who swear they cannot cook. I know they are lying though. Every one can make something. Even if it is Kraft Mac and Cheese, you can heat something up. Brian Regan shows how any one can cook.
But here are some helpful tips on getting on the fast track to cooking.
1. Get yourself a good cook book. There are a lot out there. A lot. Seriously, a lot of cook books. But how do you know which one to get? Well, get one that fits you. Make sure you look through it first. Does it have food you would like to eat? Does it look like it is at your skill level?Does it have pictures so you can follow along? Make a day of it at Barnes and Noble's or your local used book store and really read the recipes and the descriptions of things. Some books I can recommend are: The Joy of Cooking, The Betty Crocker Cookbook, Mark Bitteman's How To Cook Everything, and Deborah Madison's Vegetarian Cooking For Everyone. I especially like the Madison book. I read that one like it was a Faulkner.
2. Watch Cooking Shows- Cookbooks--even ones that have pictures--may be able to show you recipes, but they are not stellar at teaching technique. What do "stiff peaks" actually look like? How golden-brown is "golden brown"? Questions like these are best answered in real life. Watching cooking shows is a great way to get the "feel" of cooking. But just a warning-these are professionals who have 20 minutes to cook a meal. They can go fast. You should not. If it is the first time with a recipe, take your time to really learn the recipe. Get used to the sights, sounds, smells, colors and tastes that go into cooking your meal.
3.Taste and Clean As You Go- Whenever I add something to the pan or the pot, I always taste it. Does it need more pepper? More salt? Is it too spicy? What would balance this better? Get to know what things taste like--and how they change in relation to one another. And when I have a moment of down time, I always try to wipe off the counter and move my dirty plates, knives, spoons and bowls into the dishwasher. It makes clean-up easier after the meal.
4. Assess your meals- If you have loads of leftovers that go bad in the back of the fridge, why exactly is that the case? On the other hand, what made is meal so successful that people were disappointed when it ran out? Really try to understand your meals.
5. Learn From Your Mistakes and Try to Avoid Them- Mistakes are bound to happen. That's OK. Maybe you over-spiced your chili (a common mistake for me). Maybe you burnt the bottom of the pot. Maybe your fish is soggy. When you notice your mistakes and learn from them, you can work hard to avoid them next time. Real Simple has a great guide to avoiding common cooking mistakes.
Alright, with these things in mind, you are on your way toward being a competent cook--thus letting you eat more home cooked meals and reducing your reliance on eating out.
Competency Moment of the Week: Our house gave our landlord our 30 days notice. We have also sent in our applications for a wonderful new house with more rooms, more space and less rent. You better believe we will have some moving competency entries coming up.
Also, my mom requested a post on pickles and jams. That will be coming on Wednesday.
